5 Tips For Applying Self-Tanner Flawlessly
5 Tips For Applying Self-Tanner Flawlessly
Who doesn’t enjoy a perfect summer glow-up? A beautiful dusky tanned glow might be exactly the thing you need to amp up your summer. Tanning can boost your confidence and make you look like you’ve just returned from a vacation by the beach, even though you might have spent your entire summer, at home, doing homework! Did you know that tanning comes with several health benefits as well? It can lead to an increase in the level of vitamin D in your body and “catching some rays may lengthen your life”.
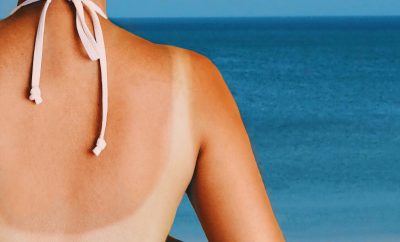
Even though sun tanning is a common practice, they come with several drawbacks. Sun tanning can irritate and burn your skin; it can augment the risk of skin cancer. Staying in the sun for a long period can hamper your eyes and skin and it takes up a lot of time. If you have been sun tanning for a while and face no problems, you do you!
However, if you’re new to tanning, or if you don’t like sun tanning, at-home self-tanning will be the best option for you.
1. Select your product
There are numerous types of tanning lotions available in the market for you. But, it’s essential to choose the best quality and the one that has good value for money. To make the correct choice, it’s essential to be familiar with your options.
Tinted Lotion
If you are a beginner, the tinted lotion is your best friend. The tan might be a little light on the first application but that’s a sign that it won’t leave streaks on your skin. The Australian gold indoor tanning lotion might be a good option
to consider for smooth and effective tanning. With one or two more applications you’ll be good to go.
Liquids
Application of liquid tan is quite simple and the results they give are pretty good as well.
After applying the tan, leave it for about 15 minutes and rinse off with lukewarm water.
Choose the correct shade widely and use mitts or cotton swabs to avoid streaks of tan on your skin.
Mousse
Beginner or pro, mousse is suitable for all.
It dries up quickly, thus saving some time. The lightweight formula will penetrate through your skin easily.
This is a good option for you if you’re not fond of heavy tanning agents.
Gel
Gels are best for when you need to tan in a hurry. It dries up the fastest and you’re good to go in no time. And, they aren’t even sticky.
Mist/Spray
Mists give you a good finish. However, you need to be a pro to get that bronze. Get professional help for a good spray tan.
2. Exfoliate
Exfoliation before tanning is an extremely vital step. It scrapes the dead and dry skin that had been blocking the pores of your skin and leaves your skin fresh, glowing and soft. Tanning on unexfoliated skin will make the tan fade away as soon as the dead skin starts peeling off, making your skin look uneven and patchy and dry. Be it before tanning or shaving, exfoliation is an absolute must! It makes your skin a clean palette, thus preparing the skin for your tanning lotion to work on smoothly.
Just like moisturization, you need to take care of the dry and thicker parts of your body more than the others, like, the knees, the elbows, the ankles, and so on. Try to plan out when you’re going to self-tan and thus, exfoliate and shave a day before that. This helps the pores of your skin to rest and avoid skin irritation. Exfoliate gently using circular motions with an exfoliating tool like a loofah or a brush, for approximately 30 seconds for each area. Increase the time for thicker parts of your body, as mentioned above.
Wash off your body with lukewarm water. You can use any good quality scrubs for this. Coffee scrubs work like wonders.
3. Moisturize
Moisturization, just like exfoliation, is key when it comes to self-tanning. Dehydrated skin will hamper the entire tanning process and make your skin look blotchy and fake. It is essential to moisturize the dry areas of your body, like the elbows and the knees.
This will prevent dark blotches of the tanning lotion and ensure a smooth and natural finish. If your skin type is normal to oily, moisturizing just the dry areas will be fine. But, if you have dry skin, lather some body lotion all over your body. Make sure it’s neither too thick nor too lightweight. Apply lotion both before and after tanning. Don’t forget your lips. This will give a natural and even finish.
Another tip to keep in mind while self-tanning is to moisturize at least four hours after you have tanned. This will ensure that the bronzing ingredient gets enough time to be absorbed into the skin. Immediate moisturization will form streaks on your skin, making your skin blotchy and uneven.
Correct moisturization makes an immense difference to your tan, making you look like a dusky goddess!
4. Apply evenly without missing a spot
Avoid using your hands to spread the tanning lotion on the skin. Instead, use gloves or mitts. Not only does this avoid your palms from getting dark, but it also ensures that the lotion is evenly distributed throughout, giving your skin a very natural bronze. The right way to apply the tan is to pump out the lotion on the lower part of your mitts. Then, use your fingers to distribute the lotion evenly. This gives a better finish.
However, if you don’t have one of these, and using your palms is the only option at that moment, you can use some micellar water to get rid of the excess tan. There are two ways to apply – 1. Circular motions 2. Vertical motions. There is no good or bad method to apply the tan. Both are good enough if you can distribute the lotion evenly and work with it with ease. Vertical strokes prevent your tan from becoming blotchy. Circular motions, on the other hand, can prevent your tan from becoming streaky. Make sure you stick to the method you are more comfortable with.
5. Avoid blotches
There’s nothing more frustrating than waiting for an hour for you tan to develop, only to shower and see blotchy skin afterwards. Small brown patches are common and they usually occur when you don’t give your skin much time (approximately 24 hours or more) after shaving. To avoid such patchy skin, wax two days before your tanning day. According to an expert, you can even take a cold shower before the tan application. This will minimise the size of the pores and make the tan look smooth.
Do not hurry while tanning! That’s an absolute no-no! You don’t want to rush with the application and end up with noticeable streaks on your skin. You are bound to mess up the tan if your hurry. Be very slow and precise while applying your tan. After taking all these precautions, your chances of messing up your tan is low, but you might still end up with blotchy skin. What do you do then?
As weird as it may sound, rubbing ketchup on your body can remove the excess tan from your skin. It’ll lighten the tan. Hair removal cream and baby oil work just as fine. We hope these tips have helped you. Self-tanning isn’t very complicated if you follow the methods correctly. It’s so much easier than sun-tanning.
However, it does take a few practices to achieve that perfect goddess-like bronze. Therefore, go get tanning and get ready to rock your summer months!
Featured images Pixabay
References